Hello fellow readers!

I have kept my promise and I have built something new with a few pallets. I recently came upon a great source of pallets that are in great shape. They are chemically treated, so they will last quite a while. They were used to haul cardboard so at least I know there aren’t any REALLY toxic chemicals on the wood other than what would be in regular pressure treated lumber.
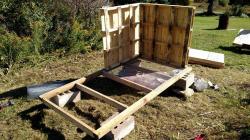
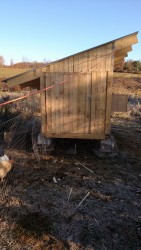
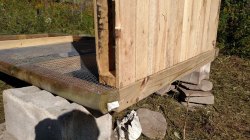
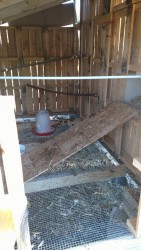
12122653_10153702124083478_7960561557761858400_nSo anyway, I used about 5 pallets to build this coop. I also have a gracious neighbor who gave me two landscaping timbers to use as bottom rails. I mounted the bottom frame on cinder blocks and field stone.

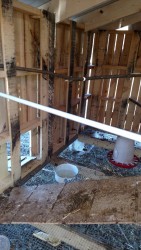
I then bought some hardware cloth and stapled it across the bottom so that the chicken12115535_10153702124208478_6588436197097495638_n manure would fall right to the ground. I made sort of a lean-to roof out of 2X8 lumber I bought and left over 12107281_10153702124708478_5713115505629419724_nroofing that I STILL had leftover from my other pallet barn project. I had the roof sloping so that the west wind would not have a damaging effect should any storms come along.12049402_10153705627458478_136994185988808480_n
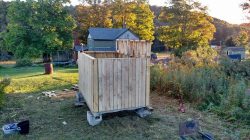
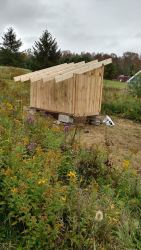
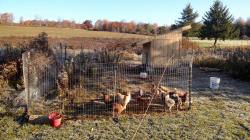
I cut out a small entrance door for the chickens, and a human door so we can access the inside. I also built one egg laying box. I will add two more as they all fight over getting a chance to use it. I placed it next to an area where I cut down some brush next to an 12140852_10153728626728478_4030075741522017953_novergrown field. I have a small area of that fenced in. Once I get more fencing, I will increase their forage area.
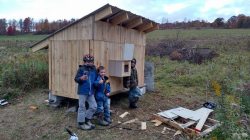
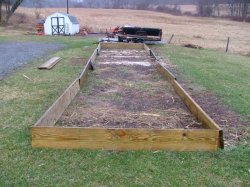
Ever since they started using it, 12074656_10153744043178478_4754959207487340399_nthey have been laying eggs MUCH better than they were. Although where they were prior wasn’t the most ideal for them, they really worked over our new garden area and turned hundreds of bags of leaves into fertilized, rich, soft soil!
12063333_10153744000423478_8519027066427334673_n 12046864_10153743999693478_4268920681116930929_n 12039496_10153743999198478_1620982966691752573_n


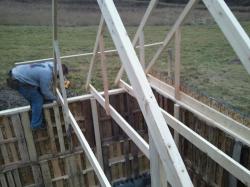
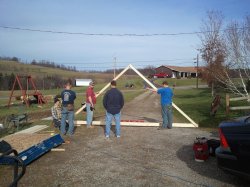
Lifting a truss.

Setting a truss.

Fir strip for setting trusses and for nailers for the metal roofing.

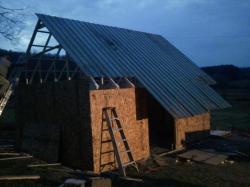
Shell is done.

Leftover metal roof from my house a few years ago.

half the roof on...just needs trimming.


I had my brother and his kids up for hunting after Thanksgiving. I made use of their time, and also invited my other two brothers and my dad to help. It was a great time working together. Three generations of Schwarz men working together to raise a barn…it was awesome.

Adding the second layer of pallets.

Everyone had an important part in the whole process. I had lots of minds to bounce ideas off of. The younger men (my nephews) were very useful in doing the things that just needed extra hands to be done, holding this or that, bringing lumber where it needed to be, nailing, screwing etc… One of my brothers was helpful in being a “go-getter” when we needed material I hadn’t gotten already and also as an extra set of hands.

Adding interior support and exterior sheathing.

Another brother did some other jobs I wasn’t able to get done with all the busyness, and he helped build the trusses. And the other brother was able to be a sort of  “job foreman”, directing the younger kids what to do, and being able to jump on jobs without much instruction. My Dad was helpful in thinking of different ways to design and build the trusses and where to add extra support of the entire structure.

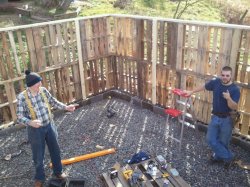
Taking a break for some laughter and planning.

I thought I would be completely stressed out trying to direct everyone, but it went rather smoothly. Everything seemed to work out. Any hiccups were quickly figured out and never really became a problem. I didn’t get as much done in that day as I had hoped due to some early morning errands that took too long but all in all a lot got accomplished. A big thank you to my family!

Both layers on. Top plate installed. Sheathing and Trusses ready to be installed.

Designing the trusses.

Building the trusses.Lifting trusses in place.Setting the trusses.Fir strip to set trusses and also for nailers for metal roofing.Almost finished the trusses.

Leftover metal roof from my house used.


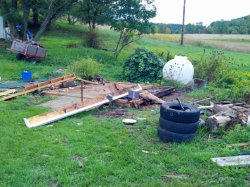
Old shed in background

I think its time to update you all on how the pallet barn/shed is coming along. This past summer I was able to commit myself to emptying out the existing shed and tearing it down before it fell in on everything, or on someone. It was completely rotting away due to a hole in the roof and the wet area it was set on. I had my friend come over to help tear it down to the base. I hauled away the material

Shed is down.

because none of it was worthy of recycling in this project. I am going to make use of other material that are recycled.  The run to the dump was probably the heaviest I have ever taken. I believe it was well over 1,000lbs!

So after doing that, I began to measure out and level the area where I was going to build the new barn. The back corner will be at the same spot as the former shed, making use of the same level base.

Ready to haul to the dump!

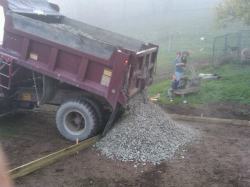
Then it will extend out in towards the hill and driveway. It will be a 16’X20′ barn.  My friend let me borrow his Kubota with a bucket on it to level out an area and spread out some soil/fill that I had piled up over the summer. I then built plywood forms and staked them to be level. Then I had 8 tons ($12.70/ton) of 2B gravel poured inside the forms. Uphill from the base, I used leftover drain pipe and covered that with gravel so any water running down the hill will drain out around the barn pad…well most of it hopefully!

Leveled ground and built form.

I am in the midst of leveling out the gravel inside the forms. I am also collecting old cinder block from a friends old barn that was knocked down. It will need a little cleaning up, but they will work great. I am going to lay the cinder block around the perimeter of the form and build the pallets on them to keep them away from any moisture. This also gives me more headroom inside the barn.

More pics to come in next update…

8 tons of 2B stone.

Ready to build!


This is an update as to what I have been up to lately. We have about 6 new chicks (1 mo. old now) out in the coop. We have 5 Khaki Campbell ducks on their way in late may, and 4 of our goats are pregnant and due in late June.

My next project is to tear down our existing sheds and build sheds made out of pallets. This would be our garden shed (may also double as sugar shack), and our goat shed. I’d like to make it bigger and have dry space for hay and feed storage.

We also had a great sap season. I gathered 400+ gallons of sap which returned 14 gallons of syrup. I boiled about 15 gallons of sap at home after my boiler friend stopped boiling. We got 1.5 quarts from doing that over the fire pit. The kids loved it!

Boiling sap at home

We also received a baby Sannen buckling from a friend. He was a week old in mid march and we are bottle feeding him currently. I also built a goat milking stand for when our two goats, who are half dairy breed, freshen. The other two goats are Boer goats so we will not be milking them. =)

Goat stand from scrap wood.